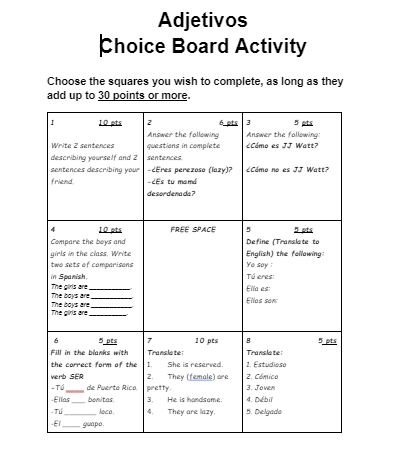
I created this super quick Choice Board to review adjectives in my beginning Spanish class. Feel free to copy this and use it. The editable copy can be found on my TpT store. I have been putting up some other review items this week, so if you need some, check them out and keep checking back, because I am adding new things every day!
As the years go by, I notice more and more that students lose focus more quickly. There are LOTS of BIG feelings about the subject in the world of education, but it really is just a reality. I find that my students really need something interactive to stay engaged and focused! This is one reason I am such a HUGE proponent of using a predictable, dependable daily framework for instruction. I first started this years ago when teaching in a self-contained bilingual elementary classroom. We had a schedule to keep us moving, and it really helped students know what to expect and stay on task. Fast forward about 20 years, and things haven’t really changed. Kids still thrive in structure, no matter the subject or grade level.
That being said, part of teaching is constantly learning. We have to grow and change WITH our students. The students I started teaching in the 90s were very different than the students I am teaching now. They are just honestly NOT entertained as easily, and they seem to need almost CONSTANT interaction. I am not saying they can’t work on their own, I am simply noting their needs are different.
With that in mind, I have begun creating a series of interactive logic puzzles. This gets students reading, thinking and then challenges them to write and be creative as well. I started with just interactive stickers, which you can read about in THIS post, but now I have created some interactive logic puzzles I think you will find engaging.
HOW DO I USE THIS?
There are several ways you could use this resource. You could do this as a whole class by reading the clues aloud and trying to solve it alone. You could assign it to table groups or partners and make a contest out of who can finish first. You could also give it as an individual assignment or assessment.
Another way to use it is to just print out the main page and then have students write on the copy OR even cut out the name tags and have them manipulate them by moving them around. These are great options for littles who may not be as adept with the Google Slides.
So, HERE is a link to a free beginner version in English. A more advanced version with editable pages and a Spanish version can be found on my TpT store. I am also working on more for our review, so check back to find more fun!
I hope this gets your students reading and showing you what they know!
Happy Teaching!
Alana
You can go HERE and learn more about the SraKSpanish squads! Join today!
In an earlier blog post HERE, I talked about some ways to use these story cards. Set 1 was out at that time. Since then, I have created Set 2 for my review station activities here at the end of the year.
The best thing about these is that each card has three unique writing prompts. You can print them front to back and put them in a page protector or laminate them and keep them in a Literacy Center as a standing activity. You can vary the output expectation based on the level of your class.
These can be used for World Language, Bilingual, ESL or even regular ELA classes. They can be used for individual writing or group writing. Students can use them to get started on a longer story or simply write a short answer response.
To find the whole set, you can visit the listing in my TpT store HERE.
As always, I hope this idea helps you have an easy day or inspires you to create something simple like it that keeps students engaged and you able to easily stay in the class language.
Happy Sunday! Looking for something to do TOMORROW with no prep? I got you covered! This is a quick, easy station activity or group assignment or individual assignment!
I originally created this to be part of my review stations for the end of the year in both my Spanish classes and my ESL classes. It works great as a quick, 15 minute or so station, but… kids LOVE to draw! So, if you make them draw AND color, this could quickly become a full class period lesson. First, you would have them try on their own. They would need to sketch what they think it says. Then, have them work with a partner or table group to make sure they all understood the same story. Once they are sure, they can finalize their sketch and color it. Finally, as a last step, have them write to answer the questions. For beginners, you may have them write in the language they are most comfortable with. For intermediates, they should be able to write in the class language. You can also add some extra questions or have them continue the story for 1-2 frames on the back of the paper as an extension!
Here is the English version! The English and Spanish versions can be found on my TpT store for a quick, easy download. Or, feel free to take the story and just have students fold their paper into 8 sections and write the story in! No copies needed! I have been in schools before where making copies was just not possible. So, it just makes it a little neater if you are able to print.
Hope this inspires you to get them talking and working together! I will have this and other review station materials up for sale on my TpT store, but, as mentioned above, feel free to just have them do it on paper. The key is to sail on into the summer with low stress and high engagement!
One section of our final exam is reading comprehension. Due to the timing of state testing this year, I have to create some stations my students can do independently and in shortened periods. So, I had created the page below HERE is a link to the PDF.
This is super simple, but I have it glued into a file folder and laminated. Then, I put a passage I want them to be able to read and answer questions about.
You can have them choose the questions to answer. You can number them and assign certain questions. You could assign ALL questions. You can have them work in groups or together. You could even cut the page up and pass out one question to each group and have them answer about a passage you read together. There are SO many variations!
I even print these on a half page and then have students glue them into their interactive notebooks.
I hope this gets your students reading and showing you what they know!
In the name of keeping it comprehensible, here is a super simple way to review vocabulary and/or grammar.
This one is for reviewing “mandatos” for the final exam I am required to give. I made it super quick, so excuse the quality, but hopefully it gives you the idea of how to do this. You can then use THIS as a template to change for whatever you are needing to review and/ or introduce.
I use these sometimes with pictures of my students, things in our school or even get other teachers to help me by letting me take pictures of them with the items or doing the actions for that set of vocabulary.
Then, I talk about each picture. This gives me a chance to review previous vocabulary and also reinforce staying in the class language for as long as possible.
For example, I would use the slide above to talk about the children by describing them and their clothing, reviewing colors, reviewing what they are doing (or any other form of the verb). I could talk about this picture for 2-3 minutes without much effort by pointing to all of the different visual supports.
As always, I hope this idea helps you have an easy day or inspires you to create something simple like it that keeps students engaged and you able to easily stay in the class language.
As I posted this week, I am creating lots of materials to help my students review for the required vocabulary and grammar in the school where I teach. I do not teach these out of context throughout the year, but we do have common semester assessments, so I want them to feel prepared. I believe strongly in the use of comprehensible input for true language acquisition, so this is quite a deviation from the way I generally teach.
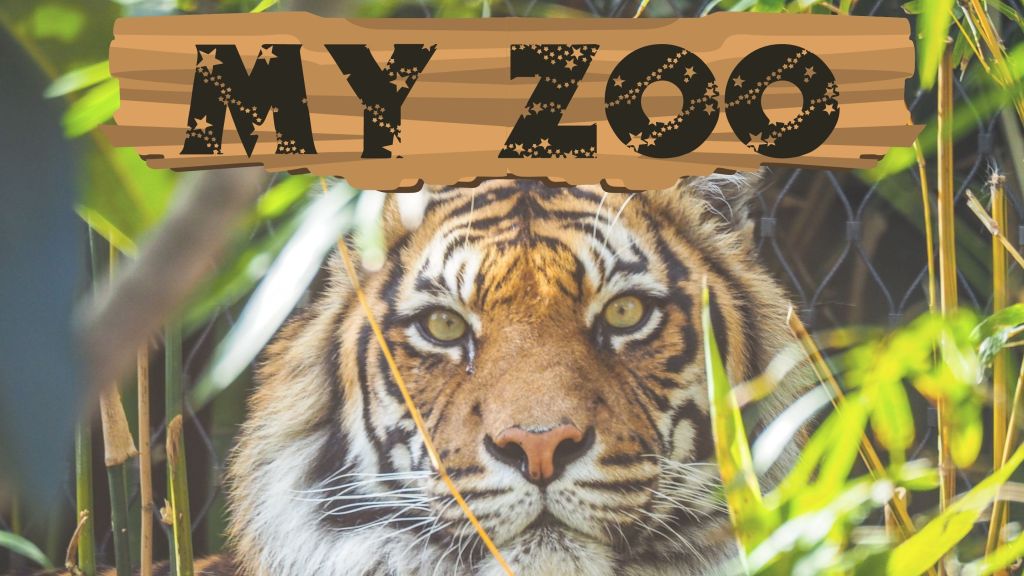
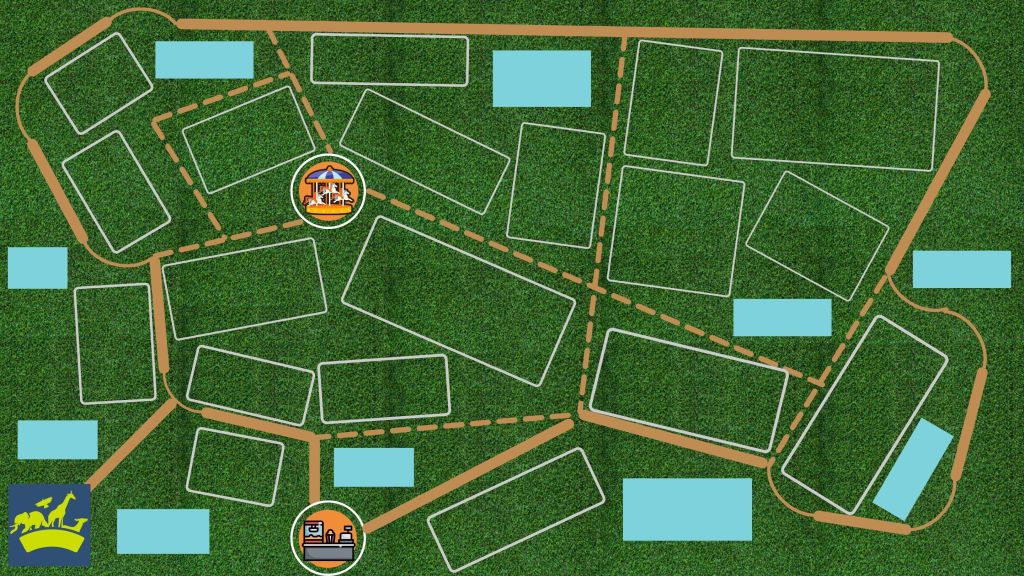
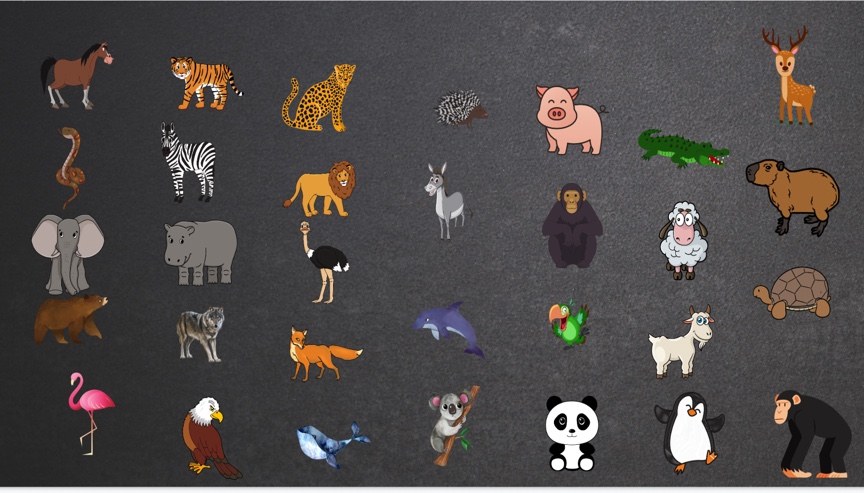
That being said, I wanted to review but keep it fun, interactive and comprehensible. So, I came up with a method I explained in an earlier post HERE. I have taken all the required vocabulary and started to create some interactive activities we can do together or in small groups. Here is one I created to review zoo animals and prepositions of place. I was able to watch students use vocabulary, listen to instructions and demonstrate an understanding of animals and prepositions of place.
This can also be used with younger students to teach the vocabulary and have them practicing the vocabulary in an interactive way. You could certainly print the zoo page and the animals stickers and have students do this in class without the use of computers as well.
Here is the place to move and label the animals.
Here are some of the stickers I used.
Hope this inspires you to get them talking and working together! I will have this and other sets of common vocabulary units up for sale on my TpT store, but you could certainly just use notecards with simple drawings or pics you print. The key is to sail on into the summer with low stress and high engagement!
I am starting to prep for reviewing my students for the required curriculum in my district. One of the things they require is for students to know the location (and I taught capitals) of all the Spanish-speaking countries. So…
Here are a few for you to have!
Yes, I realize that México is not part of “Central America,” but this is the way I had to teach it for curriculum in my district. Below, you will find another.
Since Central America is not a continent, you could also use the one below if you prefer.
Hope they help make an easy addition to your final reviews if this is part of your content! I also added this to Schoology as a “Drag and Drop” assessment and it was a hit!
I have my students glue these into their interactive notebooks, and we work on them throughout the year. They color in the country and label it as we learn about that country. I generally do Central America in the fall and South America and the others in the spring. This, again, is because it is expected in our district.
Hope having these helps you not to have to create another map.
Happy Teaching!
Alana
You can go HERE and learn more about the SraKSpanish squads! Join today!
May… that super fun time of year when state testing, end of year behavior and teacher burnout start to really create a perfect storm.
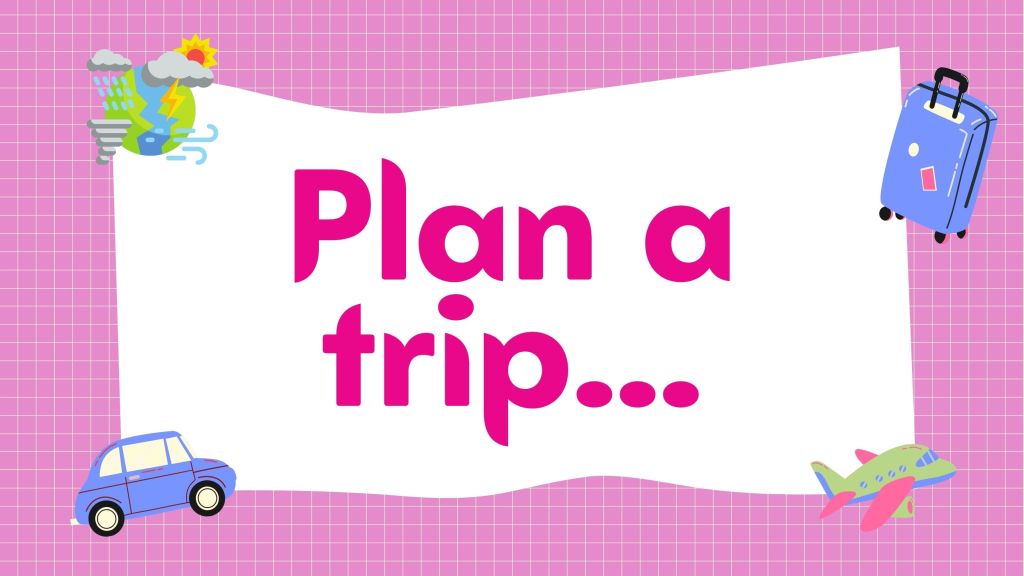
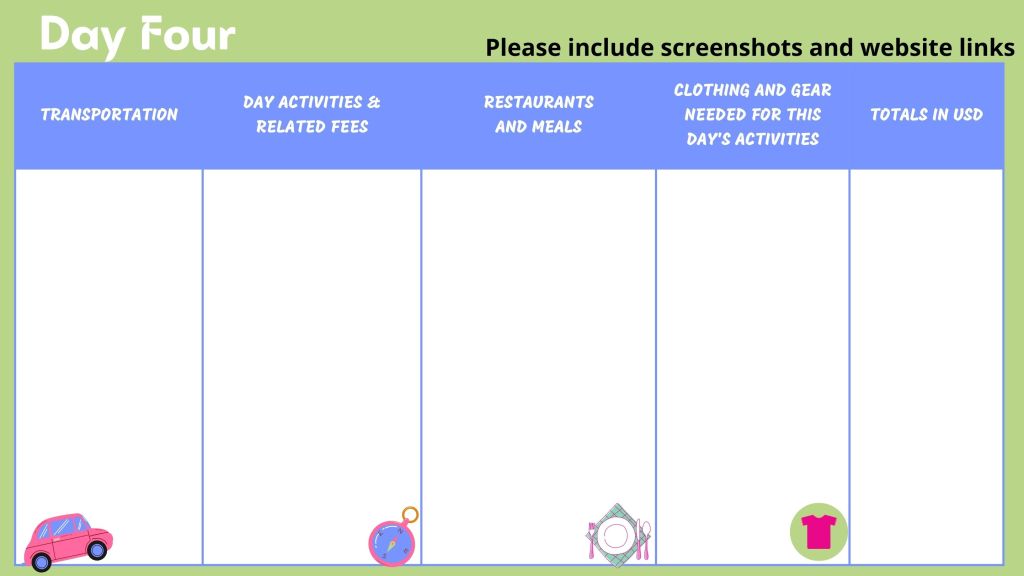
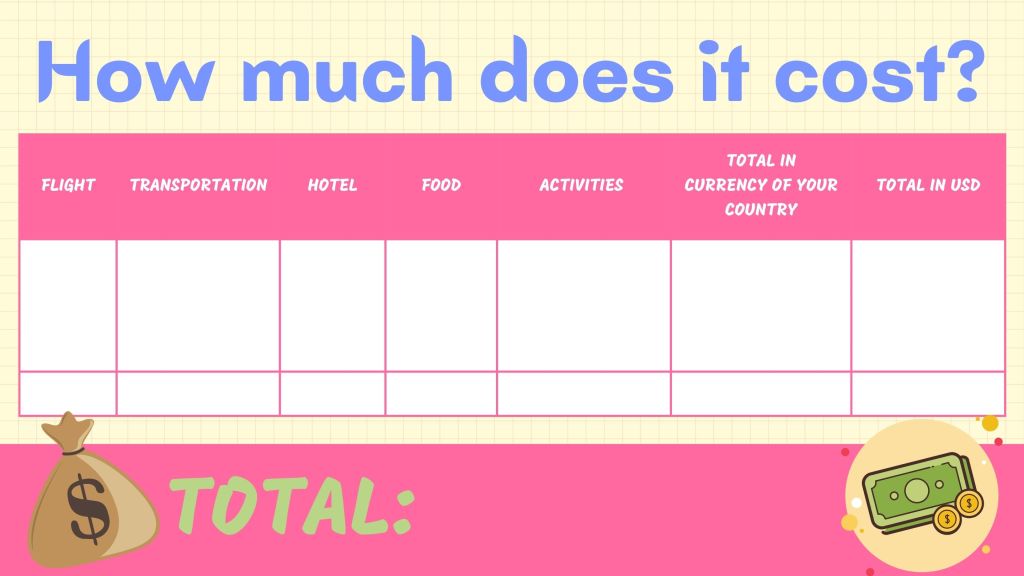
So, for me, it is project time! I have several end of year projects I use from time to time. This year, I recycled a travel project that has really been getting my students talking. They are realizing there is a HUGE world out there, waiting for them to explore it AND they are learning all that goes into planning a trip.
You could have people work in pairs or groups, but at this time of year, I prefer to let them work alone. I did allow my students to research in English. My upper levels and Heritage Speaker classes presented in Spanish, but I allowed my lower level students to choose. I loved hearing their banter about the things they were discovering about travel and faraway places.
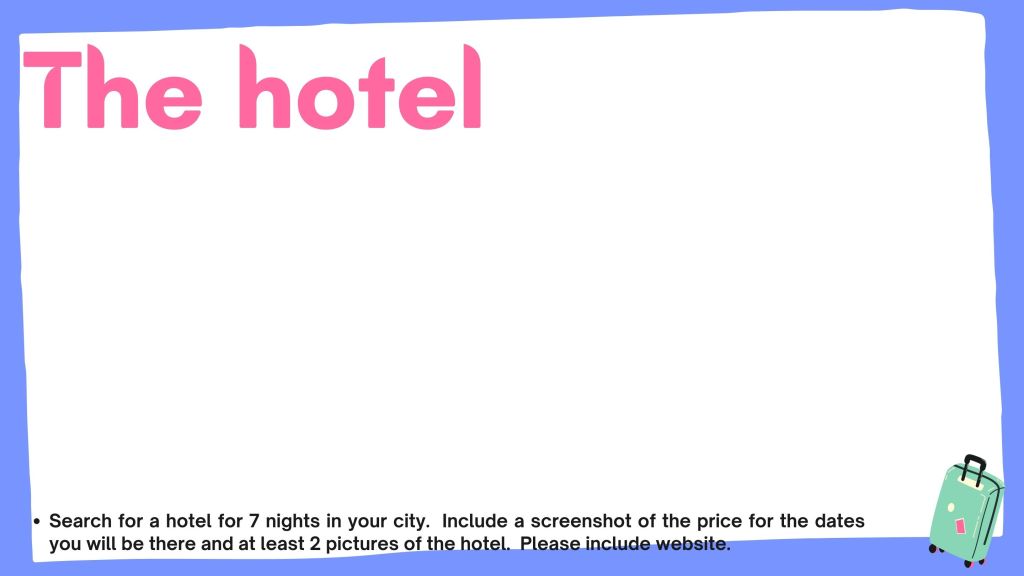
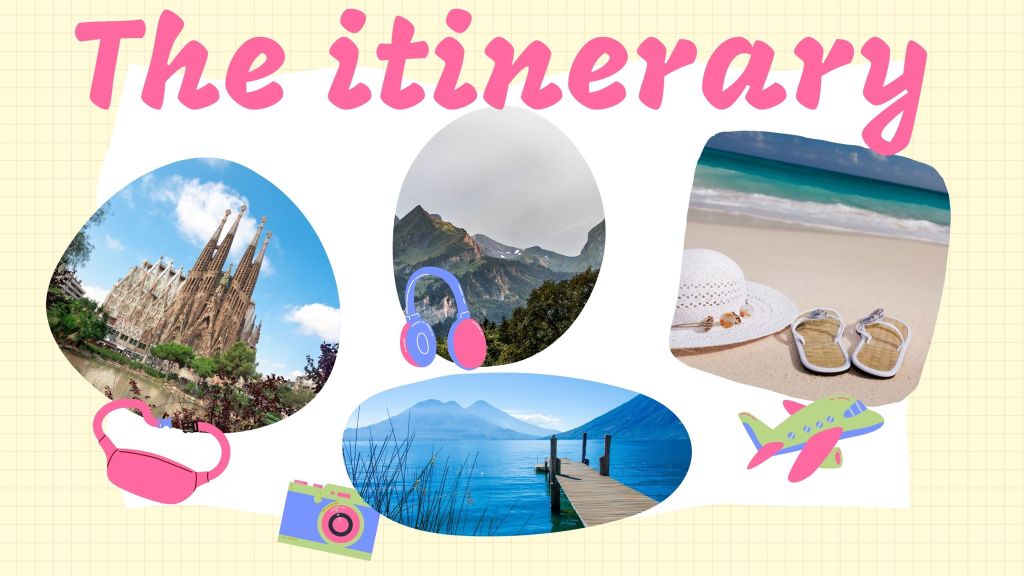
You can certainly use just a Google slideshow to have them do the project, or you could even take screenshots of the pics here and use them. The full project with all 14 slides can be found HERE for sale on my TpT store in English or in Spanish if you just want it already done :-).
It was fun, engaging and they learned and problem-solved a LOT! Win-win.
I hope this helps with some ideas for teaching about travel while keeping students focused!
It is that time of year! The students are restless and so are we! Time to get students working collaboratively so you can just observe!
This quarter, in my district, we have to teach vocabulary about travel and clothing. I have been doing lots of different things with this topic, and having fun! I will write about a few of the activities in the next few posts. This one is quick and easy after you have introduced some basic vocabulary to your students. This is kind of a twist on something a colleague of mine (MP) is doing in her class.
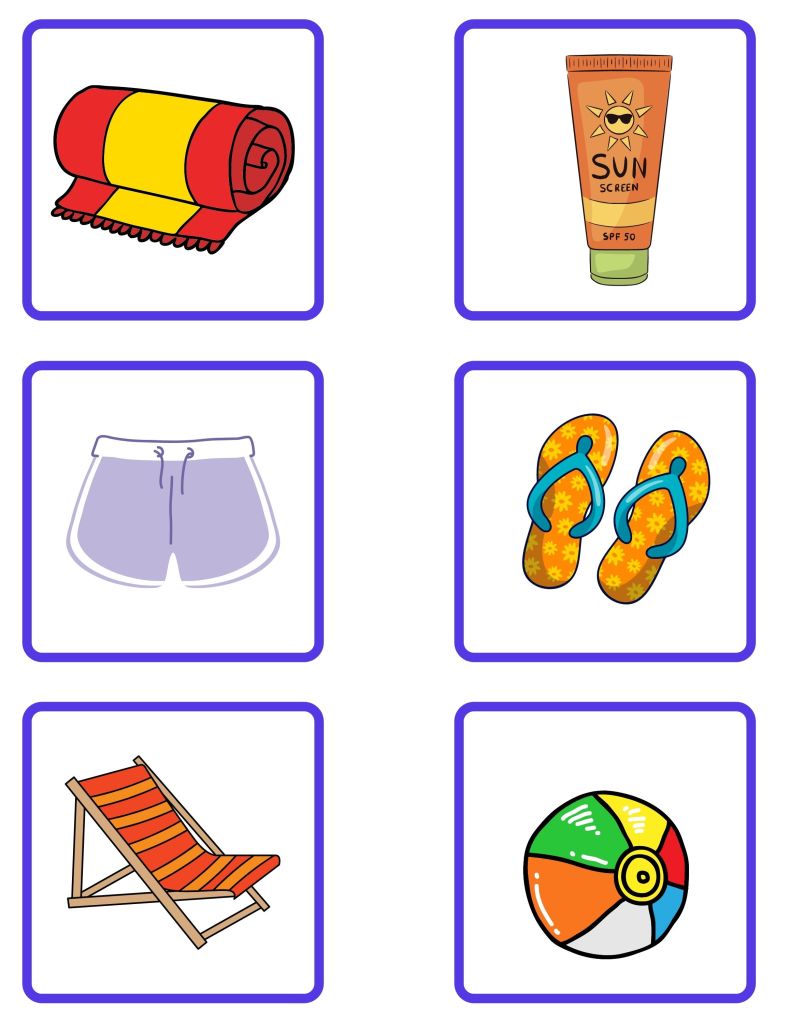
First, you use the vocabulary to make 5-6 cards with pictures. Each set of cards should be related to a visit to a certain place. For example, this one is related to a beach trip.
Then, you cut each “set” and put them in baggies. Then, each group of 3-4 students chooses a bag. They have to take the cards in the bag and use them to write about a trip they took together. Since I teach level 2, I had my students use the past tense and talk about a trip they took last year. I did pre-teach a couple of sentence stems they could use for some of their story. This is easy to level up and down according to the level of your students, but it is a great way to get them to be a little creative.
In order to prevent one person from doing all the work, my colleague had the students each write the paragraph and then only collected one from the group randomly to grade. This way, all the students had to work together to make sure they were all working. I think this is a great idea and is kind of like my daily notes sheets for students who have trouble concentrating.
Hope this inspires you to get them talking and working together! I will have a set of these Travel Story Cards up for sale on my TpT store, but you could certainly just use notecards with simple drawings or pics you print. The key is to sail on into the summer with low stress and high engagement!